Showing posts with label Ubuntu. Show all posts

Thursday, May 11, 2017

Installing phpMyadmin

Everyone thinking linux is difficult for learn but we can learn network system by linux system. I think linux is not difficult for learn but it take a long time and hard-study until are understand.Someone maybe take a short time to understand linux easily. Today I will show you how to install phpMyadmin. It is very easy for me and you all. phpMyadmin is the project of Open-source suitable for management administration Database management. Mysql Server is web-base application help to work be easily such as create Database, create Table and manage database etc. We can manage database on website so easy. Before installing phpMyAdmin we should install LAMP System first and this program should work 100%.


Installing phpMyadmin we can do this by using apt packaging system to pull down the files and install them on our system. Type command sudo apt-get install phpmyadmin php5-mysql. This step take a time about two or three minute.


sudo apt-get install phpmyadmin php5-mysqsl

Configure database for phpmyadmin with dbconfig-common? Press<Yes> and Enter


Password of the database's administartive user: I take 123456 for password.


MySQL application password for phpmyadmin: I take 123456 for password.


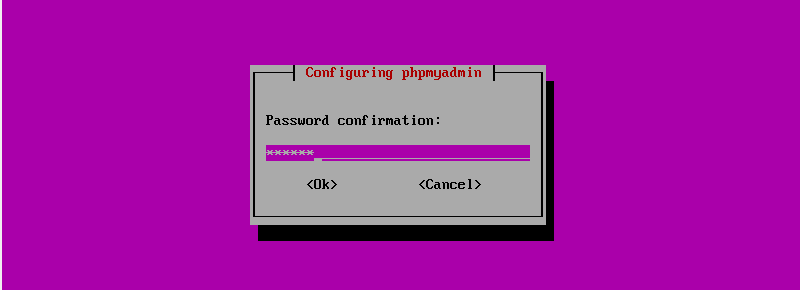
Password confirmation :  I take 123456 for password.

Web server to reconfigure automatically: Press space bar on apache2 and enter <Ok>


Next step for database installation: choose abort and press<Ok>


When installed phpmyadmin finished I type sudo reboot for reboot computer if you don't reboot computer phpmyadmin it doesn't work. After you reboot computer finished. You must testing phpmyadmin by take web browser such as Chrome or Firefox. Type 192.168.1.102/phpmyadmin on URL.


phpmyadmin installation be easy take a short time about 10 minute. When you mistake for installation you can take command sudo apt-get remove --purge phpmyadmin php5-mysql. This command line can remove package of linux when you don't want to use or you mistake for install or configuration.

Sunday, May 7, 2017

How to Check Network Interface Card (NIC) Ubuntu

Checking data of Network Interface Card (NIC) status in Ubuntu by using command line ifconfig. This command line will be show device etho and lo (Local Loopback). Notice the line inet addr will have number of IP Address 10.0.2.15 it is number of network interface card in ubuntu.


This is network interface card eth0
For some computer does not show up  eth0 or the computer does not see network interface card. You can take the command line dmesg | grep eth for checking. The screen must show the message "eth0 NIC Link is Up" . 

This is network interface card eth0
After checking network interface card eth0. Type  cat /etc/network/interfaces. The screen will show the message "eth iface eth0 inet dhcp" That mean this network interface card is DHCP(Dynamic Host Configuration Protocol).

This is network interface card eth0
And how to edit file interface for define IP address from dhcp to static. Type nano /etc/network/interfaces. Change iface eht0 inet dhcp to static and. Type these message five lines

address 10.0.2.111
netmast 255.255.255.0
network 10.0.2.0
broadcast 10.0.2.255
gateway 10.0.2.2


When you type finished <ctrl+x> . Save modified buffer (ANSWERING "No" WILL DESTROY CHANGES)? Press Y and Enter. And restart service by take command line type sudo reboot
After restart type the command line ifconfig for check IP address. And type the command line ping 10.0.2.111. If the message show 
(64 bytes from 10.0.2.111: icmp_seq=1 ttl=64  ) that mean it OK.

Friday, May 5, 2017

Installation Ubuntu Linux Server

Installation of Linux operating system Ubuntu. The computer must be connected to the Internet for easy to update packages. There are the following steps.


Power on computer server input CD Ubuntu Linux Server into CD ROM for boot from CD on the screen must show logo Ubuntu choose the Language for install.
Show Logo of Ubuntu
Choose the language for install
This is choosing (Keyboard Layout ) Enter <No> and choose format of Keyboard to USA for convenience to work.


Enter USA wait until Ubuntu processing is finished


Enter the name of the host as needed to refer to the DNS (I choose name baba) and enter to <continue>


Enter your time zone, I select East Indiana ( Because i live in Thailand)


I chooses <Guided - use entries disk> Enter


Enter <SCSI3 (0,0,0) (sda) - 8.6 GB ATA VBOX HARDDISK>


Write the change to disk?. Enter <Yes>


Continue without installing a kernel?. Choose <Yes> and Enter


Full name for the new user: I take the name nana. And enter <continue>


Username for your account: I take the name mama. And enter <continue>


Choose a password for the new user: I take password 123456 and enter <continue>


Re-enter password to verify: take same password 123456 and enter <continue>


HTTP proxy information (blank for none): I take blank and enter  <continue>


Choose soft ware to install. I choose DNS server, OpenSSH server, Print server and Samba File server. Enter <continue> wait until installation finishes.


When install Ubuntu finished. Enter <continue> the operating system will be restarting immediately. So easy for install Ubuntu operating system to work but you will lose a little time while upgrade system.


Posts

Typing Is Easy

Typing is important for work on computer. The next morning if you have many texts you will become lazy for typing. If you are lucky, maybe ...